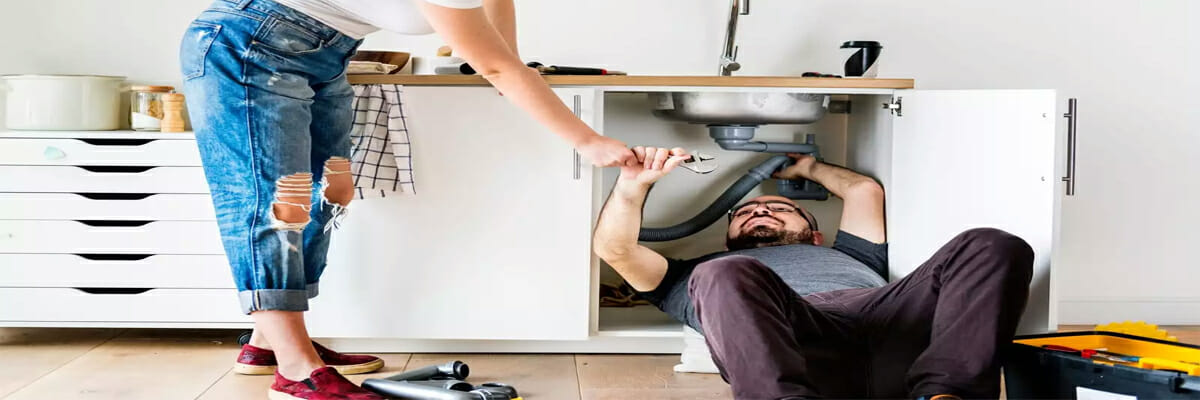
Tired of calling a plumber every time a faucet leaks or a drain clogs? With a few basic tools and a little know-how, you can solve many simple plumbing problems on your own. We’ll show you how to manage everything from leaky pipes to running toilets in this DIY plumbing guide, so you can save time and money while keeping your home in good shape.
Precautions to Take Before Attempting DIY Plumbing Repairs
Before starting a DIY house plumbing repair job, homeowners should consider a few key criteria, just as they do before starting any wiring project. The plumbing guides we provide for specific problems are listed below. These instructions will tell you what tools you’ll need and how long the job will take.
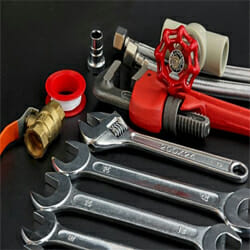
- Make sure you get the proper tools: Without the right equipment, you can discover that midway through a DIY plumbing task you have painted yourself into a corner.
 Learn what repair components you could need: Never rely on fittings or repair parts that can be combined. Look for the supplier of the components or components you plan to use. You will typically have to find direct substitutes. Find a piping service outlet; if you can’t find whatever you require at a home improvement store, you might have to take the old parts there so they can give you just an exact fit.
- Pay attention to the water pressure and turn off the water supply first: The major water valves in your house must be found and switched off if the water shut-off piston under the washbasin or toilet does not function or if you cannot find one.
- As you dismantle objects, pay great attention to the positioning and organisation of the components: The parts for the faucets, toilets, and other assemblies must be reassembled in the correct sequence and orientation, otherwise, things might not function. Drawing a diagram or taking a photo using a phone can be helpful.
- Be prepared for unforeseen water streams or pools on the floor: Have a mop handy as well as sponges, fabric, or hand towels. A pail or bucket would also come in helpful if water starts to leak from a plumbing fixture or toilet cistern.
 Learn what repair components you could need: Never rely on fittings or repair parts that can be combined. Look for the supplier of the components or components you plan to use.
 Common DIY Plumbing Mistakes
Plumbing is not usually a simple task for people to do themselves. There are numerous chances for errors to be made throughout the procedure, which could result in leaks, flooding, or the need to repair supplies and machinery. The most frequent mistakes made by individuals while repairing or upgrading their plumbing are:
- Leaving burrs on cutting pipes may lower the water supply and cause the pipe to deteriorate more quickly.
- Inserting copper wires without cleaning them.
- Utilising lead glue on water supply pipelines.
- Utilising improper connections or twisting pipes.
- Failing to regularly tighten the pipes to prevent bending or collapsing.
- Omitting to apply adhesive, tape, or another suitable sort of lubricant all around fixtures.
- Combining several plumbing components without providing corrosion protection.
Several of these issues develop as a result of individuals making poor decisions. One could cause a response, for instance, by switching out one kind of metal tube for another kind. The homeowner could either have to put a barrier between the two types of metals in this situation or rebuild the whole line.
Related article: Common DIY Plumbing Mistakes You Should Avoid (Top 10 Lists)
How to Install New Water Lines in a Home
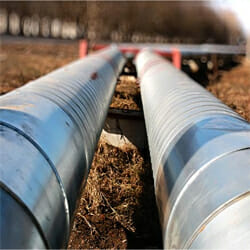 Expert plumbers generally advise customers to begin with copper plumbing to connect the hot water system to the water mainline. Typically, a pipe with a diameter of three-quarters of an inch is needed for this section of the line. Put a rubber cushion in between the copper and galvanised steel pipes while connecting them. By doing this, the tubes won’t interact with one another.
Half-inch tubes could be used to connect to a variety of fittings and devices from the hot water system. Users might select from several substances, such as copper or PEX. Users might wish to check the lengths with a dry fitting for every phase of the procedure.
Before using adhesive, tapes, or soldering, the lines are fitted properly to ensure that they’re the proper diameter. The materials determine the optimal method for joining the pipes. Individuals should look into appropriate connections, specifically if they plan to combine several various materials.
If you are looking for a professional plumber that can install new water lines. Check these two links below:
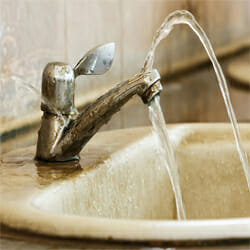
How to Fix a Leaky Faucet
The majority of typical homeowners will see attempting a leaking faucet repair as a common DIY project. Usually, a worn-out component within the faucet system that must be changed is what’s causing the leak. When disassembling anything, make sure to turn off the supply of water to the basin.
 Selecting the appropriate replacement component may be the most difficult aspect of fixing a leaky faucet. The brand title and product code will typically be visible on the fixture, and several faucet companies offer repair tools that are easy to locate in hardware stores or at home.
By analysing the pieces as you dismantle the fixture, you might be able to quickly determine which ones have to be changed. It is a smart option to set a dish or pan in the basin to ensure nothing falls into the drain when you’re functioning because many of the parts could be small.
Keep a record of how each component has to be put back together. Check for any mineral or dirt buildup that has to be removed when you put things back together.
To replace faucet knobs or covers, an Allen wrench would probably be required. You can be better equipped to cope with a range of taps and other fixtures by purchasing a set of them. The handles of the slip-joint pliers can be covered in adhesive to fasten decorative fixture caps without harming the finish.
How to Fix a Clogged Sink
When dealing with a blocked sink drain, one of the most important points to remember is that utilising liquid drain cleaner solutions may exacerbate the problem. These substances have the potential to damage pipes, leading to leaks or breaks. Then you’ll have a far bigger issue to deal with than a blockage.
 Also, you might have pools of caustic chemicals that could burn people or harm objects they come into contact with. Use a plunger to unclog a clogged sink; it works best. You might have to unscrew and wash out the P-trap underneath the sink if that does not eliminate the obstruction.
If you have previously put solvents down the drain, avoid using a plunger. Utilising plungers may force stored fluids to spill, which can result in severe flesh burns from these substances.
If no substances have been dumped down the drain, you may apply a plunger to start clearing the obstruction. Load the basin with roughly four inches of water to create a strong barrier between the plunger and the obstruction. When you start plunging into the double sink configuration, block the other drain with a damp cloth.
If there is a dishwasher link, clip the dishwashing plumbing system and compress it. This will prevent the dirty, blocked water from being forced into the dishwater as you plunge. The dishwasher connections must have a flexible end that lets you attach the clamp.
During plunging, the objective is to push water instead of air into the clogged drain. To check if there is no air retained within the plunger bell, it may be beneficial to spin the plunger’s tip under the water’s surface in the basin. Keep the bell submerged in water and use pressure to move the plunger up and down.
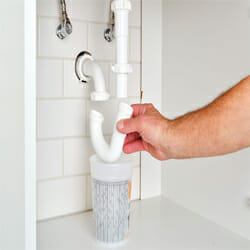 Once you’ve completed your last upstroke and pull-out, if the liquid in the basin hasn’t entirely drained out, continue the procedure for a few minutes. If there is still no luck, the P-trap behind the basin can be removed as a further step to access the clog. The tube that is U-shaped and in the shape of an upside-down “P” beneath the sink is known as a P-trap.
Before you start disassembling parts, you’ll want to drain the sink completely. If you lower the P-trap, the liquid in the basin would otherwise start to stream out of the drainage. To prevent any liquid from spilling out after the P-trap is withdrawn, make sure you keep a pan or container underneath the trap.
To unfasten the round slip nuts connecting the P-trap at every end, you will require slip-joint tweezers. You must be able to pull out the P-trap by first loosening the slide screw at the tip of the P-trap nearest to the walls.
After removing the P-trap and locating the obstruction inside, you may simply pull it out. When you restore the P-trap, avoid over-tightening the slip nuts. Pour some hot water into the drain to check the line. If the issue persists, you will have to snake the lines to reach the obstruction, which is located past the P-trap.
Related articles:
How to Fix a Running Toilet
A leaking flapper is among the most frequent reasons for a leaking toilet. After a flush, the filling valve may refill the tank again since the flapper shuts off the tank. Water leaks from the tanks whenever the flapper fails to form a tight barrier, and the filling valve remains operating to refill the tanks to the appropriate water level. An easy do-it-yourself fix is replacing a damaged flapper.
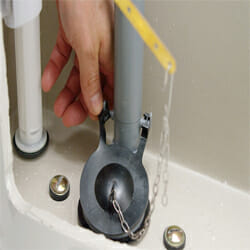 When you listen to the toilet flow, you will determine if the flapper needs replacement. When the tank is opened, the flappers at the ends of the chain that are connected to the flush valve may be seen at the bottom of the tank.
Knock the flapper downward with a stick. If you do this, the liquid would be capable of filling to the proper level, and the fill valves would cut off if it couldn’t run out of the container. When you hear it cease, you’ll know that a faulty flapper was the cause of the issue. The fill valve will likely begin to operate once you release the stick.
The majority of home improvement shops and hardware retailers will stock either a generic version or a brand-name company’s repair kit. If you go with a viable replacement, you can often see better outcomes. The majority of kits include a thorough installation guide and images. Before beginning a flapper installation, turn off the toilet’s supply of water and gather some cleaning supplies.
How to Install a Water Filter
Making sure your household consumes the cleanest water available at home by using a filtration system is a terrific idea. Also, installing models made to fit beneath your sink is simple. This is how an under-sink water filter is often installed.
You will need to make an opening in the basin top for the tap because under-sink filtration systems have different faucets for purified water. You may use the soap dispenser or water nozzle that comes equipped with your kitchen basin top. If you have to make a hole, adhere to the directions that came with your filters.
Water can be supplied through the included connection by connecting it to the chilled water line. Attach the water supply to the filter. Using the included filter, attach the replacement faucets to the filter.
Installing a whole-house water purifier is another way to guarantee that the fresh water in your home is as clean as it can be and to combat the impacts of hard water.
How to Replace a Garbage Disposal
An excellent kitchen accessory is a garbage disposal, which facilitates cleaning after food preparation and prevents drain obstructions. But waste disposals are labor-intensive appliances, so you could have to swap out a worn-out old version. The typical homeowner may easily complete this task.
 Begin by inspecting every component that comes with your modern disposal. To prevent leaks, a variety of fastening bands, flanges, and seals are found on waste disposals. Make sure you arrange the pieces and practice assembling them according to the instructions before you begin the task.
From the outlet, detach the knockout discs. You should take off this plastic connector before installing the disposal. Use a screwdriver and a hammer to knock on it to dislodge it.
To keep the disposal in place when you perform the required connections, raise it with a supporter. It won’t matter if it’s a paint container, a few wood planks, or anything similar. Make the electric connections while cutting the electricity to the circuit that powers the garbage disposal.
Attach the intake and output pipes. Make the sink flange ready. If the current one is in good condition, you may use it again. As directed, connect the disposal to the flange. Check the disposal by turning the electricity back on.
Think about the rated output before buying a garbage disposal. Be sure the specifications of your replacement disposal at least match those of the previous one. Go for a higher horsepower rating if you’re looking for a little bit more grinding power.
Conclusion
In conclusion, while hiring a professional plumber may be the best option for complex plumbing issues, many minor plumbing problems can be easily fixed by a DIY approach. To help homeowners address these minor issues, a DIY guide to resolving plumbing issues is a valuable resource that can provide step-by-step instructions on how to safely and effectively perform repairs. By following the tips and steps outlined in this guide, you can save yourself time and money while gaining the satisfaction of a job well done.
Remember to always prioritize safety, take preventative measures to avoid future problems, and seek professional help if you’re unsure about a plumbing issue. With a bit of practice and patience, you can become your own reliable plumber and tackle plumbing problems like a pro.
For any plumbing inquiries, call Damien McEvoy Plumbing 24 hours a day at (02) 8599 4593.
 Enquire